Creating a Managed Account
This topic describes how to add managed accounts under a partner account.
Partner account Company Admins can create managed accounts and onboard managed account users.
Important
- All managed accounts must be created as new.
- You cannot convert an existing customer account to a managed account, and a managed account cannot be converted to a direct customer account.
To create a managed account
- Log in as a Company Admin.
-
Click Partner Admin in the left navigation.

-
Click Create Managed Account.
-
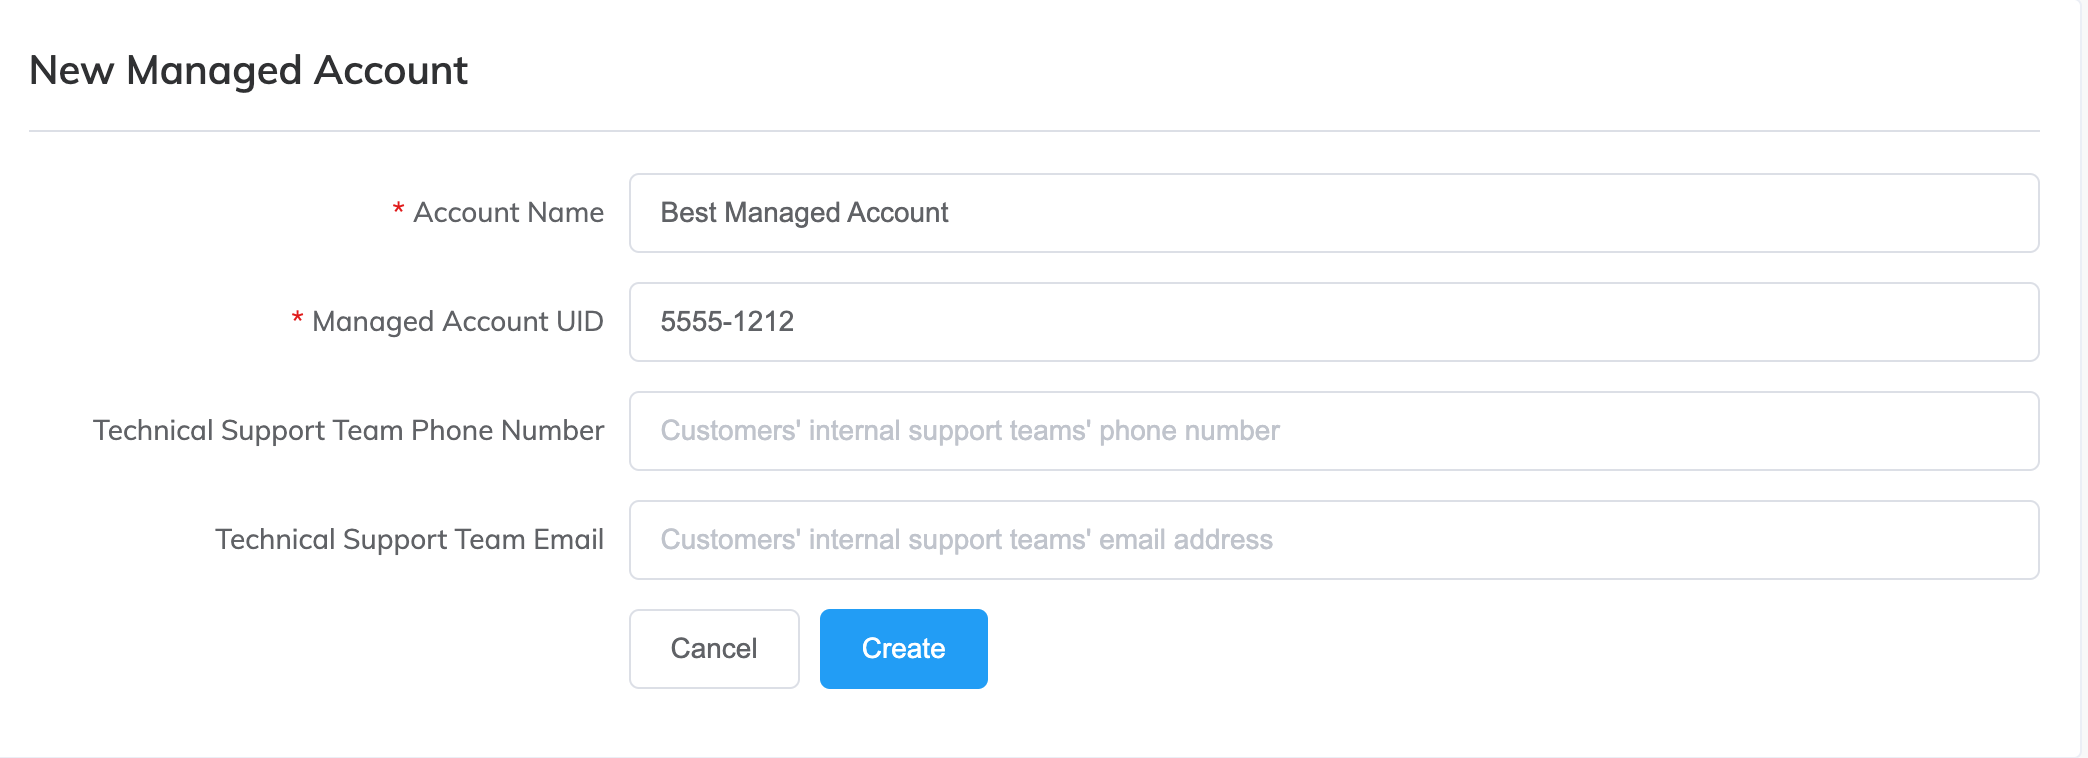
Provide these details:
-
Account Name – Specify a unique name for the account that is easily identifiable, particularly if you plan on having more than one account.
The description length is from 1 to 128 characters. To keep the company name anonymous, enter an alias name. The alias name appears on the Company Profile page.
Managed account users supported by a partner can view the company profile and the company name or alias is visible to managed account users.
-
Account Reference – Enter the managed account reference.
The partner assigns a unique reference to each managed account. The reference length is from 1 to 128 characters. The reference is typically an identifier used in partner systems (for example, CRM or billing). The reference is shown on the invoices under Your Reference. The reference also identifies the account in email notifications.
-
Technical Support Phone Number – Enter the phone number of your internal support team.
Megaport validates the number against the billing market format of your Billing Contact phone number.
Megaport requires a technical support phone number and a technical support email address for Megaport-supported managed accounts, but they are optional for partner-supported managed accounts. For more information, see Providing Support Contact Details.
-
Technical Support Email – Enter the email address of your internal support team.
Megaport validates the email format and address against the email address provided during account sign up.
-
-
Click Create.
The Feature Configuration prompt is displayed.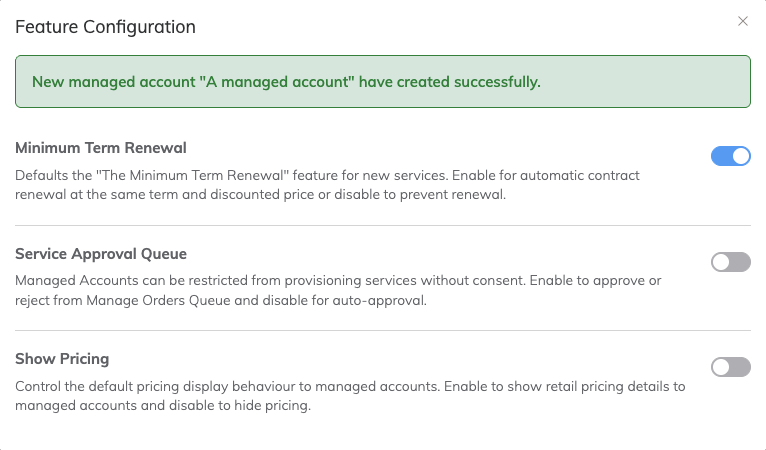
This prompt allows you to turn the following features on or off for the managed account:
- Minimum Term Renewal – Enable automatic renewal of service contracts at the same duration and price. For more information, see Managing Minimum Term Renewal.
- Service Approval Queue – Require partner approval before managed account users can order services, make changes to existing services, or terminate services. For more information, see Service Approval Queue.
- Show Pricing – Display retail pricing information to managed account users. For more information, see What Account Users Can View and Access.
- Cross Connect – Allow managed account users to order Cross Connects. This option is available only for Megaport supported managed accounts. For partner-supported managed accounts, the option is grayed out.
When you have configured these settings, close the prompt. Your selections are automatically saved.
You can create as many managed accounts as you like. The accounts appear in a list on the Managed Accounts page.
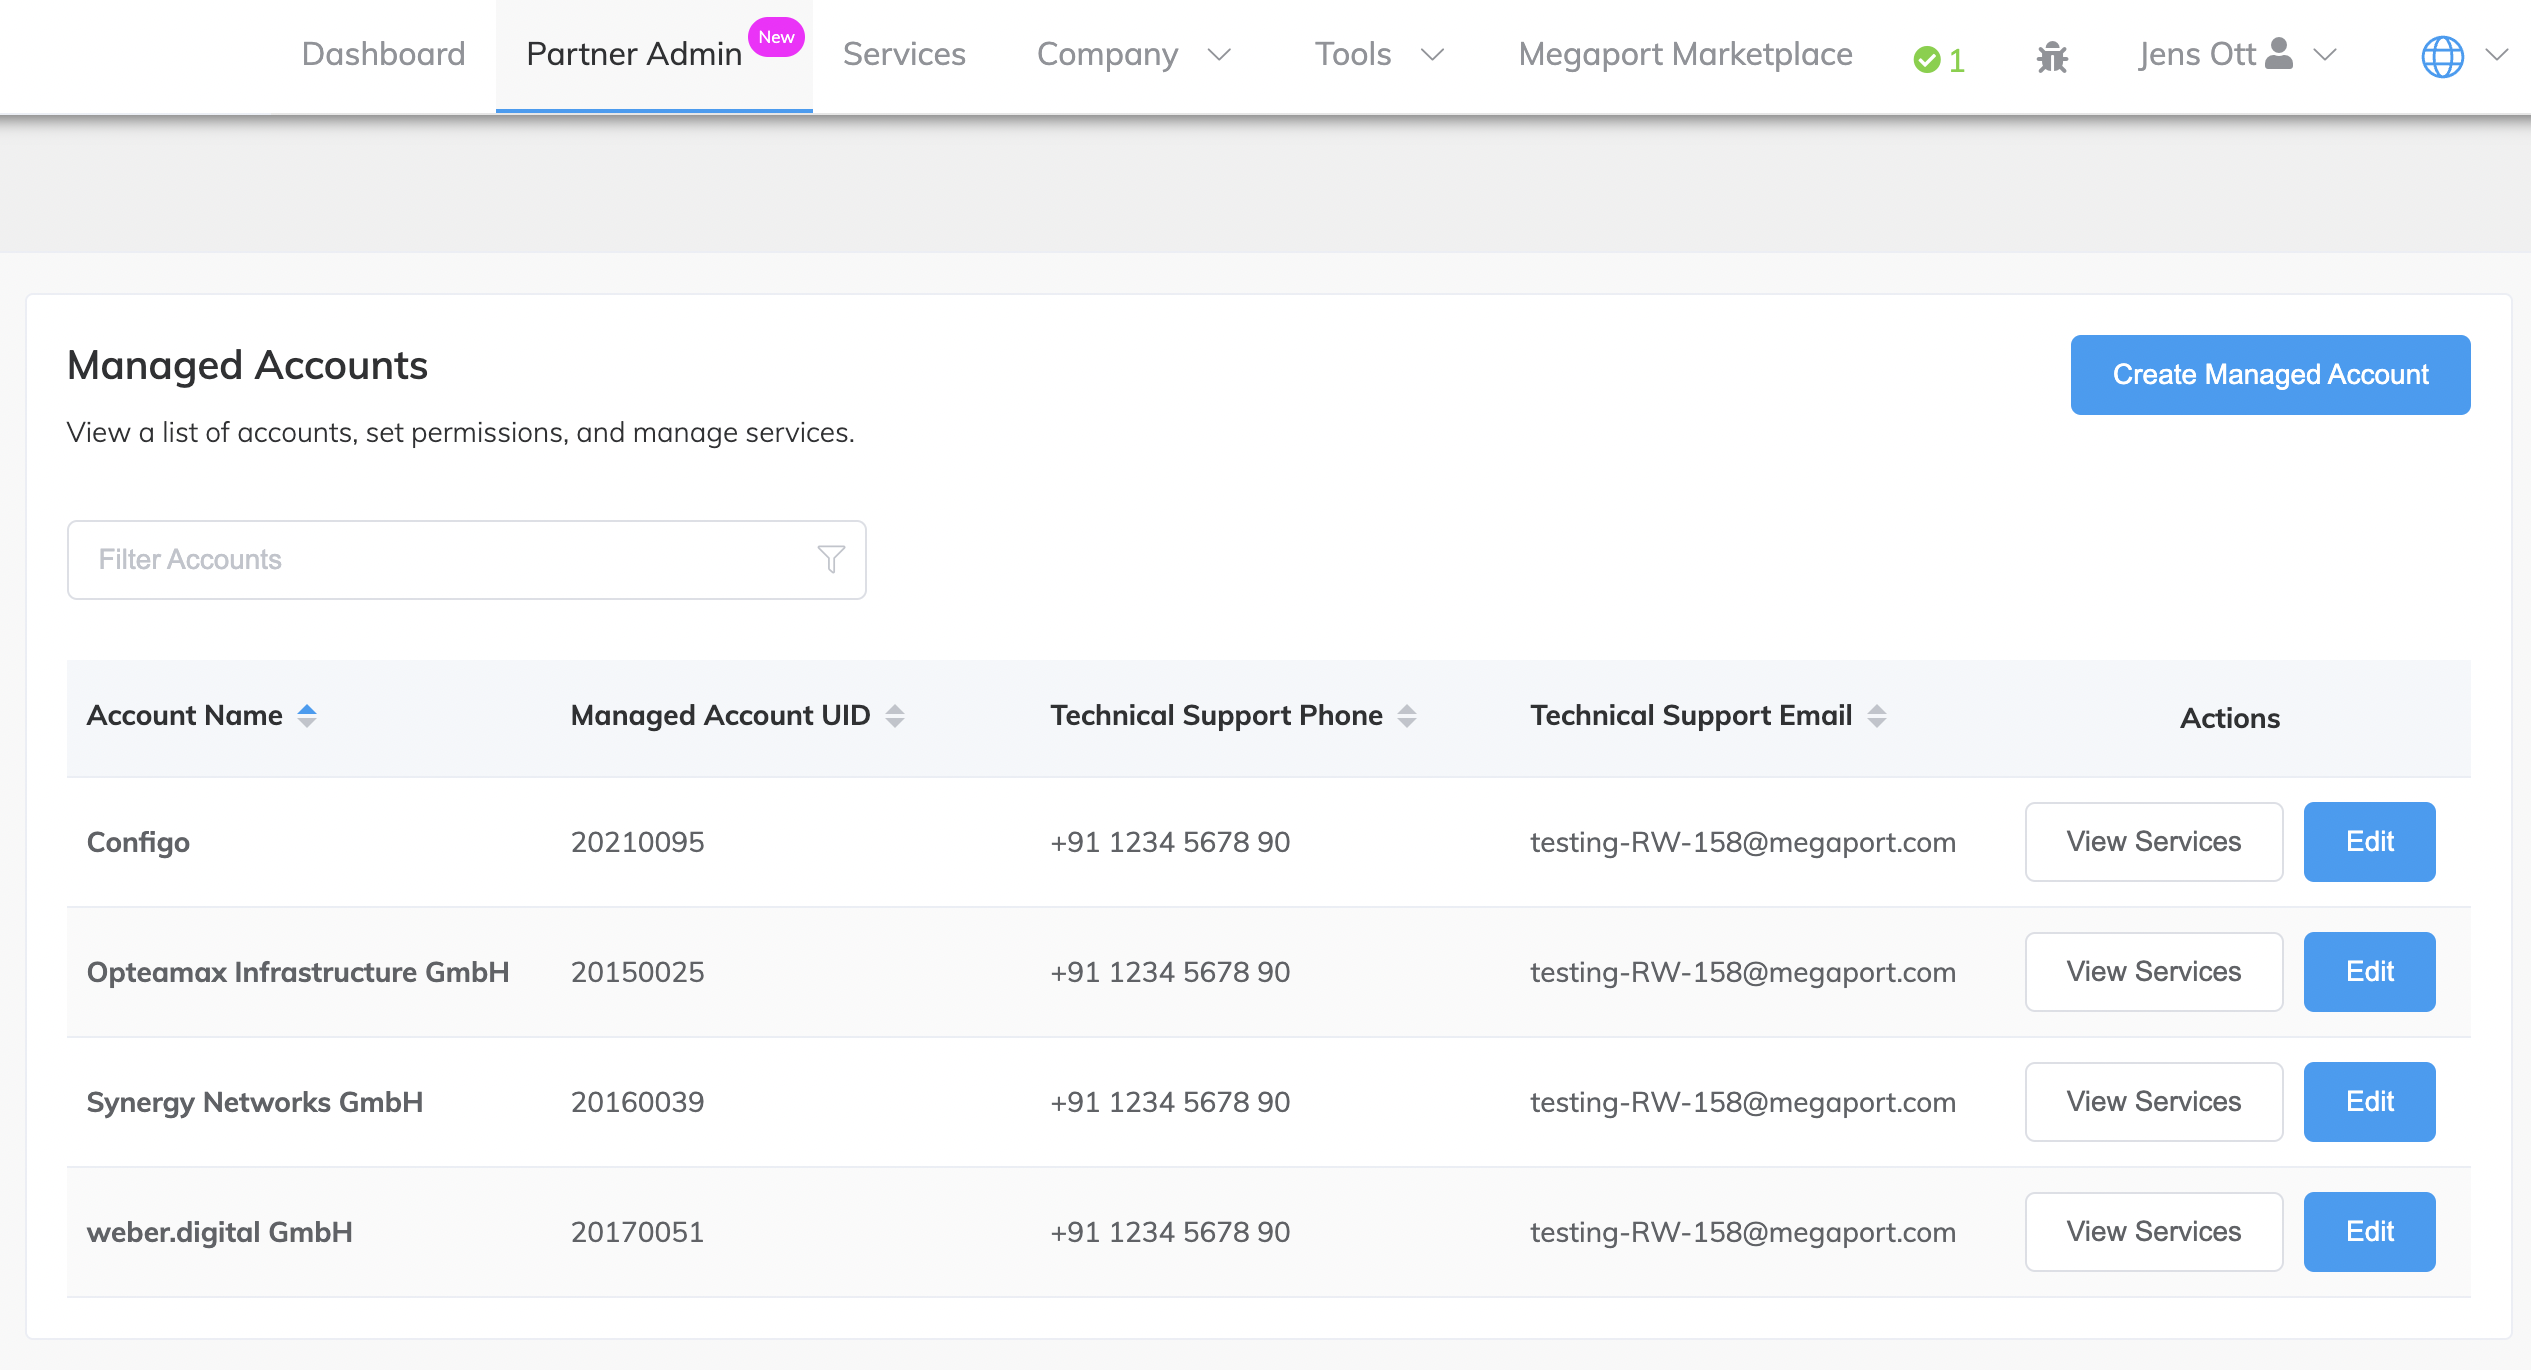
You can filter the list and sort the columns.
To sort the list by column
- Click the up/down triangles next to a column heading.
The table columns reload, if necessary. - Click the heading again to reverse the order.
A small up or down triangle reflects the current bidirectional sort order.
-
Click View Services to switch into the managed account and see all configured account services, such as Ports.
For more information, see Viewing Services. -
Click Edit to change account settings and technical support contact details.
Note
If you refresh the browser window when logged in as a partner and viewing a managed account, the Portal logs you out and back in again. The browser window returns to the partner context instead of the managed account you were viewing before the refresh.
Next steps
Now that you’ve created a managed account, the next steps are to add users and order services, such as Ports, Virtual Cross Connects (VXCs), Megaport Virtual Edges (MVEs), and so on.
-
See Adding and Modifying Managed Account Users for information about adding and managing users.
-
See Creating and Ordering Services for information about new service orders for partner accounts or managed users.